Get ready for a day of music and singing with your toddler by making homemade tambourines. All you need is two plates, a handful of beans, string and whatever you would like to decorate with.
In Psalm 150, the Bible tells us to praise the Lord with music. We enjoyed singing Bible songs and praising the Lord through our music. Pick out your favorite songs and get singing.
Color the plates with markers.
Poke holes around the edge with a hole puncher or a knife about an inch apart.
Then Thread the string through the plates. to Hold together. After you get about 3/4 complete, fill the plate with your beans.
Then finish threading and tie the string to secure.
If you want to add any other decorations, you can do so now.
Get singing and shake your tambourine to the rhythm.
Have fun!
Here is a Video for You to Enjoy!
The black around the edge is tape I added because B was pulling the string.
This year we decided to plant a garden. With 3 boys, we eat a lot of produce. Sweet Potatoes is one of our favorites and I really wanted to grow our own. If you have never grown sweet potatoes, it is quite a bit different then growing regular potatoes. Sweet potatoes are grown from slips. You need to purchase these from a supplier.
We planted two varieties, Ginseng Red and Beauregard. We had 6 slips of each variety. Each plant will provide us with 4-10 potatoes. Usually, if you plant them and just leave them without doing much care you will get 3-4 potatoes. If you take time and care for your plants, you will yield up to 10 or more potatoes. It really depends on how much time you invest in your garden.
It is important to keep weeds away from sweet potatoes as much as possible. Therefore it is best to use a plastic mulch on this part of your garden. First lay out the weed barrier and cover sides and ends with soil to keep it in place. The plastic mulch will also hold the heat into the ground which the plants love. Also, sweet potatoes need plenty of sun, so pick an area of your garden that has lots of natural light.
To prepare our garden for planting we had a tractor come till the ground. Then we spread fertilizer on the ground. Here B is helping Luke spread the fertilizer. Then Luke raked the ground to ever the fertilizer out. I added the black plastic mulch in the first row for our sweet potatoes.
Here is the sweet potato slips ready for planting. When you first get them, be sure to unwrap and place the roots in water until ready to plant. Use a trowel, poke a hole into the mulch making sure to dig into the ground to bury the roots. Place the slip into the hole and pack the soil around in firmly.
Space the plants about 18 inches apart. Water them well. For best results water them regularly throughout the summer.
5 easy steps to planting sweet potatoes
1. Fertilize garden
2. Add black plastic mulch to sweet potato rows.
3. Use trowel to dig hole through mulch into ground for planting.
4. Plant sweet potato slip in ground leaving only a couple leaves above ground.
Last year we planted a butterfly garden with butterfly houses. I wanted to attract more butterflies to our backyard so I decided to make some easy butterfly feeders. I had all the supplies needed at home so for me it was free. If you need to purchase sponges, the ones I used came from Dollarama.
We have been spending most of our days in our backyard lately and I am trying to make a natural place for my boys to play. There is so much to be learned from nature. When we moved into our house, our backyard was a blank slate of grass and I have been working at creating the perfect flower garden that is unique, beautiful, natural and an enjoyable area.
Step-By-Step Instructions To Your Easy Butterfly Feeder
Step 1
Mix Water and Sugar together to form a syrupy liquid. Butterflies love this sweet taste. Don't worry about exact measurements just add sugar to water until syrupy.
Step 2
Cut your sponge in quarters by cutting in half (the long way) and then in half again.
Step 3
Poke a hole to add a string for hanging. Coat the sponge well with syrup. Press into the syrup so sponge is full. Hold over dish to catch any drips.
Step 4
Hang your butterfly feeders. I choose to hang mine on the bottom of my butterfly houses.
Enjoy watching the butterflies use their long tongues to eat from these feeders.
This post is part of Friday Outdoor Projects and Activities. Check Back Weekly for New Posts.
"But He was wounded for our transgressions, He was bruised for our iniquities; The chastisement for our peace was upon Him, And by His stripes we are healed." Isaiah 53:5 NKJV
We went to Youth Convention 2015 from May 15-17. It was an awesome time. God moved and many were filled with the Holy Ghost and baptized in Jesus name. We can live with out a lot of things in this world but above all us we must be saved.
Although, many people have sicknesses and diseases in their lives, I know that my God is a healer. Just as the Bible states in Isaiah 53:5, I am a firm believer that Jesus Christ bore my sin on Calvary. He endured the whip across His back for my children because he knew that on May 17, 2015 my sons would be healed. Do you know of anything more amazing then that? My God didn't want my sons to live a life with food allergies and other sicknesses. He healed them.
We know the Easter story how Jesus died on the cross to save us from our sins, but he didn't stop there. He made a way for miracles and healing as well. And I will forever thank God for changing our lives through his healing power.
My son Malachi was first diagnosed with allergies to Milk protein and Soy protein at 7 months old. Since then his allergy list has grown to include wheat, peanuts, almonds, kidney beans, maple syrup, mangoes, kiwi, peaches and nectarines. People would ask us what could he eat. There were no trips to McDonalds or Pizza Hut. I cooked everything thing from scratch and we were eating healthier then ever before. When digested these foods would cause a reaction from a rash to swelling. And peanuts would cause a reaction just from the smell.
Jackson was 7 months old and weighed only 13 lbs. He severely vomited with any taste of formula and with his first taste of rice cereal. He hadn't gained any weigh since he was 5 months old, in fact, he had lost a couple ounces. Not knowing why he wasn't growing, he was being referred to a pediatrician, from whom we have not received a call yet.
On Sunday evening at YC, they invited people to the altar to receive the Holy Ghost or a miracle. Luke and I took Malachi and Jackson up to be prayed for. They were prayed for and God miraculously reached down and healed my two baby boys.
Malachi, 20 months old, on Monday enjoyed his first slice of whole wheat bread. On Tuesday, He enjoyed His first happy meal. And throughout this week he enjoyed cheezies, milk, cookies, and many foods that he couldn't eat before. Thanks be to God for healing Malachi.
Jackson enjoyed a bowl of rice cereal on Monday without becoming sick. He has also enjoyed adding new foods to his diet. Thank you Jesus for healing Jackson.
Healing s not just for my children but for everyone who believes and has faith. Just ask Jesus in faith and you can be healed too. Thank God for your healing!
During our vacation we took our boys to Science East. It was a fun filled adventure with lots of learning experiences. The entire museum is hands-on, perfect for exploring. Two of the rooms in the museum are geared towards toddlers and preschoolers and we spent the majority of our time exploring this area.
With over 150 exhibits, we learned about tornadoes, frogs, electricity and much more. Located at the museum is a climbing wall and an outdoor playground. Lots of fun for every age.
There is no better place to take toddlers then a museum that is entirely hands on. Play, Discover and Learn at a Science Museum close to you. If you become a member of the science museum, you will have free admission to over 300 museums across North America.
B and M are exploring each exhibit and learning about science in the world all around us.
For more information check out the website for Science East located in Fredericton, New Brunswick.
These Banana Sugar are free of top allergens except for eggs. They are gluten-free. And most of all they are soft, delicious and will have you reaching for seconds. So pour a glass of your favorite milk, grab a plate and enjoy your new favorite cookies baked to perfection.
B helped me mix up the cookies. Here he is pouring the brown sugar in the bowl. Then we added oil and eggs and stirred up well.
We mixed in vanilla, baking soda, salt and baking powder. Then we added our mashed banana and mixed well. Our last step was to add starch, flours and gum and mix well to have perfect cookie batter.
In the top is the batter spooned onto the cookie sheet ready for baking. Then we put the cookies in the oven and 10 minutes later they were ready. I allowed them to cool on a cooling rack before we sampled them.
B and M are enjoying their cookies. Find the recipe below.
Banana Sugar Cookies
1 cup Brown Sugar
1/4 cup Cooking Oil
2 large Eggs 1 tsp. Vanilla
1 tsp. Baking Soda
1/4 tsp. Salt
1/2 tsp. Baking Powder
1 large banana, mashed
1 tbsp. Potato Starch
1/4 tsp. Xanthan Gum
1/2 cup Rice Flour
1 cup Corn Flour
Preheat oven to 350.
Mix sugar, oil, eggs and vanilla together in large bowl. Add soda, salt and baking powder. Stir well. Blend in mashed banana. Add Potato Starch, Xanthan Gum, Rice Flour and Corn Flour, mixing well after each addition.
Spoon onto cookie sheets. Bake for 10 minutes or until golden brown. Remove from cookie sheet immediately and place on wire rack to cool.
Enjoy the softest banana sugar cookies you will ever taste.
We can't look out into our backyards and see the entire world but when we visit the zoo we can get a glimpse of every continent around the world. Where else can you go and see African Lions, Western Cougars, Amur Tigers, Plains Zebras and Dwarf Caiman all within hours? The zoo is fun, educational and a new adventure each visit.
Discover something new at your favorite zoo. Laugh with your toddler at the swinging monkeys. Feed the deer and the goats. Snap pictures of your child on their first pony ride. Make memories that will last a lifetime.
We started our zoo visit getting pictures with this moose.
As you can see M did not enjoy this at all.
We were all having so much fun seeing all the different animals, starting with the black bear. Here we have the monkeys that enjoyed putting on a show for us. Cantaloupe, Lions, Cattle and Otters were all fun to see.
We also went inside to see various monkeys, birds and a little crocodile. (My picture didn't turn out for it.) We saw giant turtles and parrots and more animals then I can name. It was a fun day for all of us.
10 Tips to Best Enjoy the Zoo With Your Toddler
1. Visit the Zoo Before the Peak Season for a cheaper rate. If you have a zoo close by and you can afford it, buy a season pass and enjoy the zoo the entire year.
2. Go earlier in the week when it is less busy. This visit was on a Monday and was the perfect day.
3. Go when the weather is warm and not too hot that you can't enjoy yourself.
4. Don't rush through. Relax and take your time enjoying being together.
5. Pack a lunch and enjoy a picnic. Or take snacks and plenty to drink.
6. A stroller is good to have for tired little feet but be sure to let them walk around some too.
7. Take a break at the playground in the zoo and let them have fun.
8. Enjoy a pony ride, camel ride or ride on a train or carousel.
9. Bring some change so you can feed the animals in the petting areas.
10. Most of all, Have Fun!
Here we are enjoying our time together.
Check out this post for more summer fun with toddlers.
Today, I just want to wish all the mothers out there a Happy Mother's Day!
If you have the privilege to spend this day with your mother, cherish those moments together. I am not with my mother but I am spending the day with my 3 boys and enjoying being a mother today.
In our backyard, we have a fire pit made from rocks. We also used some big rocks that we had and made a sitting area on one side of the fire pit. It is always nice to sit around the fire and relax together spending time with family.
5 Things to do at your fire pit:
1. Roast hotdogs. I found hotdogs that M can eat. This was his first time eating hotdogs so here we are enjoying Natural Selections Gluten-free Hotdogs. B enjoyed this so much that everyday when we go outside he asks for hotdogs on the fire.
2. Sing campfire songs. If you have a guitar, pull it out and strum along as you all sing, laugh and enjoy this time.
3. Tell stories around the fire. Children love any story, so make something up for them or tell a story from your own childhood. Take turns sharing stories together.
4. Make Smores. Roast marshmallows and build your own smores to enjoy.
5. Relax and enjoy time together. It is very relaxing just sitting next to a fire enjoying nature as you look at God's beautiful creation.
What are some of the fun things you like to do around your fire pit? Share in the comments below.
Our newest adventure is our new baby lamb. We picked him up Sunday. He is 4 days old today. B loves his new pet, M is a little unsure. He doesn't mind him being around, he just doesn't like him being up close to him.
Originally, we were going to get two lambs, but when we went to get them, there was only one left. He is so tiny, only weighs about 5 lbs.
Snowball was one of a set of triplets. He has been bottle fed with milk replacer since he was born. Bottle fed lambs have milk replacer for up to 40 days.
It is going to be interesting this summer watching the boys play with Snowball. Luke is building a fence outside for him and he has a stall for him by our chickens. Right now, while he is bottle fed, he is sleeping in a box in our porch. He has a straw bed and he snuggles right down and sleeps.
Lambs will begin to eat grass after they are one week old. Although spring has finally arrived, we still have snow on our back lawn. The front lawn by our house is snow free but it has lots of water in places.
Soon we will have lots of fresh green grass for Snowball to enjoy. And he will enjoy being outside in his own fence with lots of space. Snowball was trying to nibble at the grass a little bit outside yesterday.
Follow us as we enjoy our newest adventure in raising a baby lamb.
My son, B, is going to be 3 in July and I have been teaching him some Bible verses. You might think that he is too young to learn memory verses but he has already learned two and I am going to keep teaching him.
Learning God's word needs to be fun for a child, especially a toddler. Use actions, crafts, coloring, games and have lots of fun. Make learning the verses fun and exciting and your child will want to learn more too.
The first two verse B learned were Isaiah 43:1 and Joshua 24:15.
Isaiah 43:1 "I have called you by name, you are mine."
B learned this by watching this video.
Joshua 24:15 "As for me and my house we will serve the Lord.
Make this easy craft to teach your child this verse.
A list of the next few Bible verses we will be learning.
Deuteronomy 6:4 Hear, O Israel: The Lord our God is One Lord.
Philippians 4:13 I can do all things through Christ which strengthens me.
Psalm 150:6 Let every thing that hath breath praise the Lord. Praise ye the Lord.
Psalm 119:11 Thy word hath I hid in mine heart, that I might not sin against thee.
Ephesians 4:5 One Lord, one faith, one baptism.
6 Tips to Teaching Memory Verses
1. Look for signs that your child is ready to memorize Bible verses. Is He remembering words from his books and 'reading' back to you? Can she sing the words to her favorite songs? Are they mimicking phrases you say? If so, chances are your child is ready to begin memorizing the Word of God.
2. Pick one verse and study it for a week. Each day spend a few minutes going over the verse and help your child repeat it after you. If they won't repeat it, don't worry about it. My son does this to me and then will repeat it back a few minutes later so I know he is learning.
3. Make it fun and exciting. Learning needs to be fun, sing your verse, make crafts, use actions, get involved with your child.
4. Encourage your child every day. Show enthusiasm every time they say the Bible verse even if they only say part of.
5. Be patient. Don't pressure them, take your time and don't expect them to learn it in a day. Just enjoy the time with them and let them learn in their own time. If it takes more than one week to learn a verse, that is okay.
6. Don't forget about the verses that your child has already learned. Say them with them every week or even every day.
We finally have a day with no rain. I took the boys outside this morning and they wanted to play in the sandbox. I dug out the sandbox toys and they spent the entire time playing in the sand. It is still cold enough for coats and hats, hopefully warm weather will be here soon.
I've never heard of a child who didn't like to play in a sandbox. Whether you choose to buy a sandbox or build one, your child will have fun for hours. Depending on the amount of sand you need to fill your sandbox, it can be quite expensive. Therefore, you want to be sure that your children are going to be able to play in it the whole summer. Follow these tips and check out the ideas for lots of Sandbox fun this year.
Tip # 1
Cover Your Sandbox to keep animals out. Use the cover that comes with it or cover it with a tarp.
Tip # 2
Sprinkle cinnamon in your Sandbox to keep bugs out.
Tip # 3
Sprinkle black pepper in your Sandbox to keep ants out. If your sand gets wet, you should add more.
Tip # 4
When you or your children get covered in wet sand, use corn starch or baby powder to wipe it right off.
Ideas
Use Recycled Items as Sandbox toys- Laundry Detergent Caps, Pop Bottle Funnels, Empty containers such as yogurt, ice cream and margarine containers and unused kitchen utensils.
Dig for Dinosaurs in your sandbox, small dinosaurs can be purchased as the dollar store.
Build sand castles.
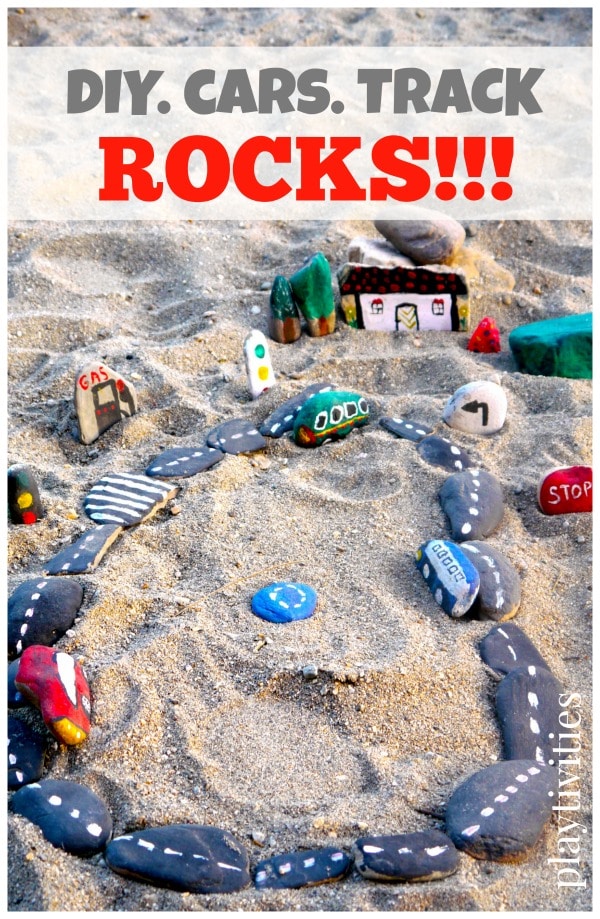
Make roads and drive your cars and trucks in them.
Make a sand hill and race small balls down the hill.
Check out these other blogs for more Sandbox ideas.
This post is part of a series. Check back each Friday for more outdoor fun and projects.